... I want to suggest that an ideal air resonating frequency for the sound holes (on a full sized violin) should be ( 213 +/- 1.8 HZ).
This is the result of many hours of analysis and comparative playing tests.
.. This 'air' frequency then becomes a pleasing 'carrier' frequency for all the various music made on the violin.
...This frequency seems to answer all the requirements for good tone: in the correct range, not an exact musical note, and a frequency that our ears preceive as especially pleasing.
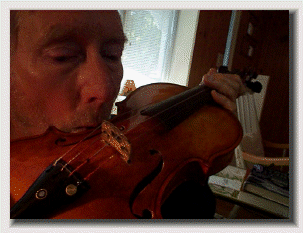
... The tone is heard by blowing across the "ff" hole long opening from the side of the instrument. Each "ff" hole has its' own tone and must be shaped individually to adjust its tone. Obviously the shape can be enlarged easier than made smaller so go about this slowly. Also remember that the shape of the "ff" holes is critical to the pleasing appearance of the instrument so they must be reshaped in such a way as to keep the overall appearance of the sound holes intact.
For the sound reference, you can use your I-Phone; get the "Tone Generator" app; and use the sinusoidal curve (the choice on the left). Dial in the desired frequency {211.20 HZ for the left ff hole or 214.8) for the E string side ff hole} and using ear phones turn the tone on and blow across the center of the sound hole you are checking. Let your mind relax and listen if your 'blow' sound result from the sound hole seems above or below. Adjust your frequency in that direction until is sounds 'quiet' . Then as you adjust in the correct direction, adjust your tone generator to keep up so you can 'sneak up' on the correct frequency. You can even estimate the .20 and .80 differences by comparing to the sound you generate blowing across the sound hole under investigation.
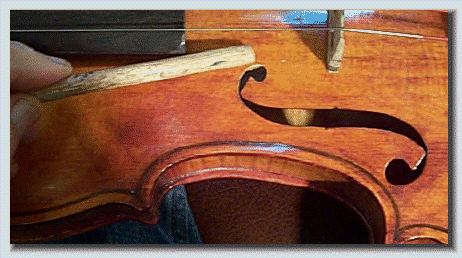
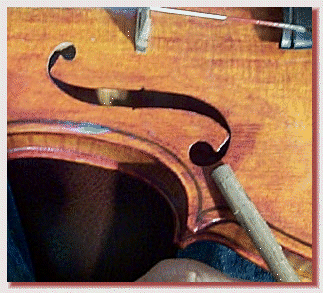
..Evenly file/ sand material from the sides of upper 'comma' area to raise 'blow across' air tone, to the desired 211.2 HZ 'blow tone frequency'.
..File / sand area of bottom 'comma' area to lower 'blow across' air tone in the center of the ff shape
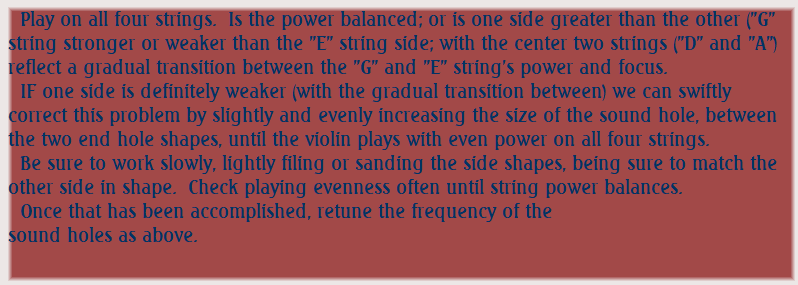
..First step is to make the side blow tone of the long part of the sound hole to be exactly (as close as you can get it) even along its long length; on both sides of the instrument. The relative pitch of these will control the balance of power of the high to low strings. Play the instrument with the bow listening to its current power on all four strings. You might hear that either the high pitched strings or low pitched strings are stronger. (The individual string power should evenly change from side to side.)
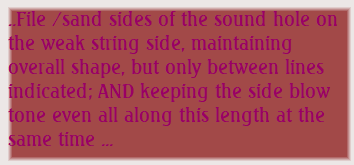
..As we want an even power between strings, we will shift this toward the wanted even string power balance, by increasing the area of the long part of the sound hole on the side that is the weakest.
..
...BUT first, we want to make the cross blow tone of each ff hole even along the center shape...:
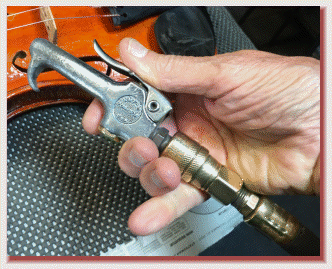
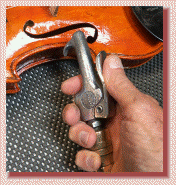
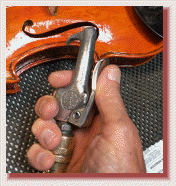
..I use a small blow nozzle with my air compressor line pressure set at 10-20 PSI. Blow straight across with short bursts to compare areas. You could use your lung power, but the air hose might be clearer to hear.
..Increase the area in the too low portion by evenly removing material from both sides in all portions until the tone is even all along the 'straight' section.
..Do this on both side's sound holes.
..
THEN, increase the size (open area) of the ff hole that in on the side of the violin that is weakest in power.
We want the violin to play with the same power on all four strings, acoustically.
..Now increase this 'straight' portion of the 'weak' sound hole until the bowed balance of violin is even and balanced. Re check this sound hole to be sure that it is still even pitch all along its length. Adjust as necessary, then recheck the balance of bowed strings' power.
This next step will adjust the "G" side sound hole to : (213 HZ average - 1.8 HZ) 211.2 HZ
..Listen to the current 'blow tone tuning'.
.. IF the sound is too low, we want to raise it by slightly (and artistically) enlarging the upper hole until the wanted frequency is reached.
.. IF, however, the sound is too high, we want to raise it by slightly (and artistically) enlarging the lower hole until the wanted frequency is reached.
..Now do the same for the right sound hole (the E string side); this time using (213 HZ + 1.8 HZ) 214.8 HZ.
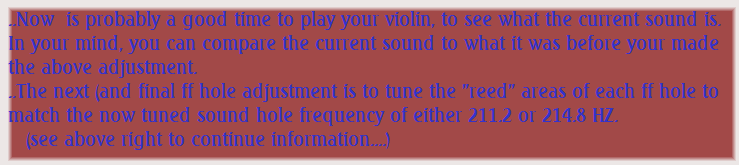
..Our final sound hole adjustment is to tune the "reeds" at each end of each sound hole. We want to match these sounds to match the sound hole tuned frequency. We will just be adjusting until they sound to be matching, neither higher or lower pitch. That is, either 211.2 HZ (G string side) or 214.8 HZ (E string side).
..If you have access to an air compressor; I have found this technique is helpful. Set air pressure to between 10 to 20 PSI.
..Blow across opening in short bursts, listening for the highest area. Now adjust the rest of the sound hole length area upward to match evenly in frequency.
..Next step is adjusting each ff hole to its correct frequency. (see below).
..The two "reeds" of each sound hole.
We now want to tune them to the rest of the sound hole, to acoustically match.
..Blow in the direction to hear the tone. Compare to the side blow frequency of the long shape of this sound hole.
..As long at the 'reed' frequency is above this, we are ready to proceed with the tuning of the reeds.
..
..However, if one or more of the 'reeds' is below the ff tuned frequency, we want to raise it exactly, or slightly be higher, to be ready for this final tuning step.
..This adjustment step is ONLY needed to raise the 'reed' shapes that are too low in 'blow' frequency:
..This adjustment is made in very slight steps, stopping when the 'reed' frequency matches our goal frequency for this sound hole (ff).
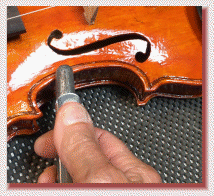
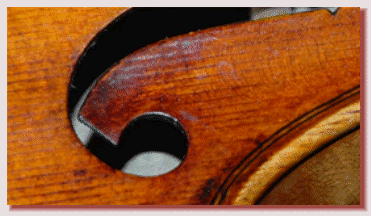
..Notice that the inside corner remains untouched and that the adjustment to the top plate wood must remain in a straight line.
..Be very careful as this wood is very fragile!.
..We will make this change with a small Emory file or flat jewelers file.
{Support under the wood if possible as you are changing end shape.}
..When the blow frequency of the reed matches goal... STOP.
..You have reached the final adjustment.
..If however, you have increased the frequency slightly too much, no problem, proceed as follows below:
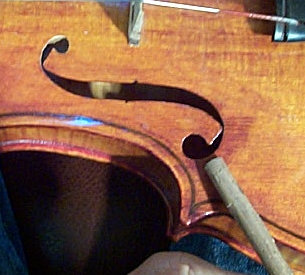
..This lowering of the 'reed' at each end is accomplished by lightly sanding in the shape shown here in small steps until the 'reed' blow frequency matched that of the tuned ff hole.
..This area is dished out smoothly... see photo below:
..Now do the 'reed' shape at the other end of this ff hole.
..Do the same for the other sound hole.
..
..I understand that the varnish will have to repaired in these spots, but if good violin Timbre is what you are after, then I would suggest that the effort is worth it! (unless I am wrong of course..)
..
..How test play your instrument again and evaluate the overall sound!