opus16construction064015.gif
opus16construction064014.gif
opus16construction064013.gif
  A special gage is used to to check the position of the neck and the fingerboard. All is well when the wood dowell extension just touches the top plate at the bridge location when the gage is laid on top of the fingerboard.
opus16construction064012.gif
opus16construction064011.gif
  The bridge height is important to the violin playing properly.
Modified 9/2017
Page O16C_64
opus16construction064010.gif
opus16construction064009.gif
opus16construction064008.gif
opus16construction064007.gif
H
opus16construction064006.gif
o
m
e
opus16construction064005.gif
opus16construction064004.gif
..(7.67") from 'ff' hole inside notch to inside of purfling {13" stop distance}
opus16construction064003.gif
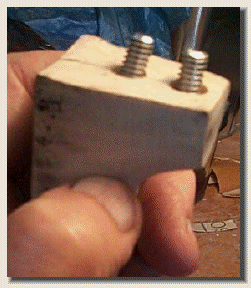
..This is where the joining 1/4" diameter by 3/4" long NC thread (13 per inch) aluminum studs fit. they will be epoxied in place with thickened West Marine Epoxy resin. (degrease first)
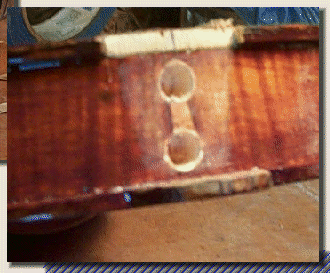
..My present method of neck joining is to perfectly fit the back of neck to the rib structure leaving the ribs intact. This to enhance the sound transmission from neck to rib structure. Layout holes are 5/16" in diameter and 0.45" deep each side; up 1/4" and 7/8" on center from bottom.
..Fit carefully in the layout fixture. Check fingerboard surface exactly level side to side with a level gage.
..Use carbon paper and chalk to refine the back-of-neck shape to match the rib surface exactly.
opus16construction064002.gif
opus16construction064001.gif