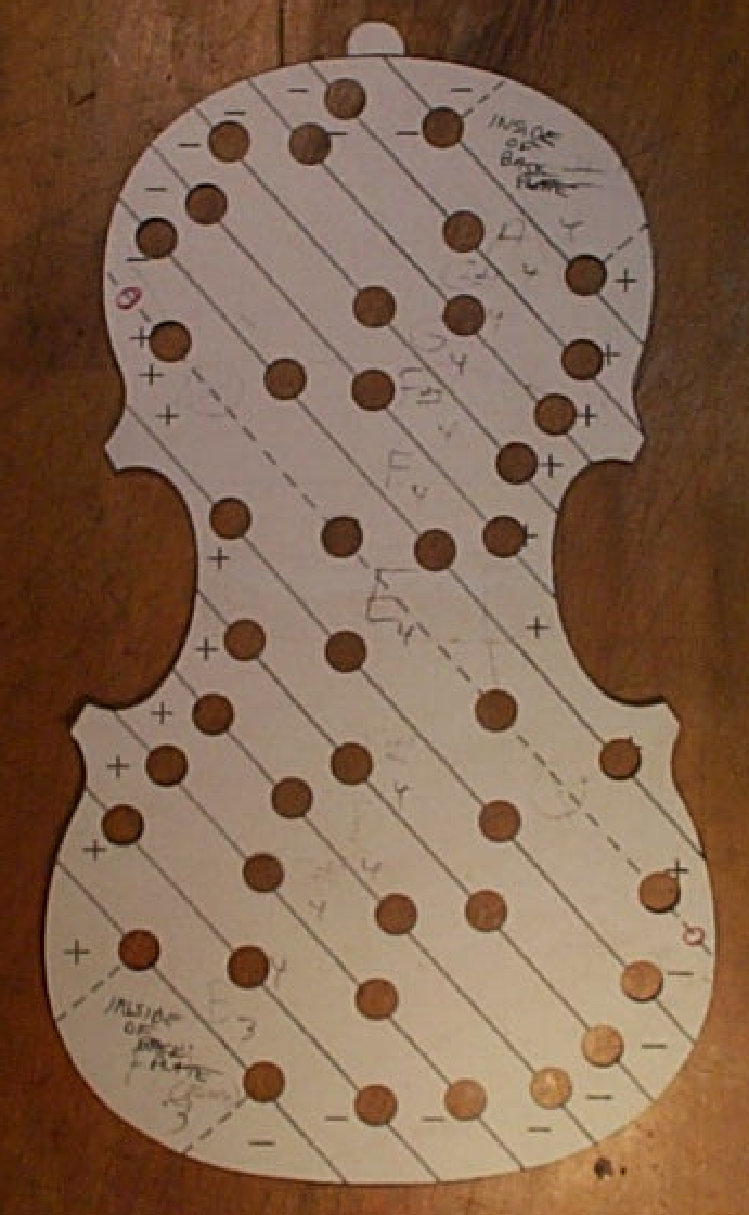
...Accurate Vigdorchik strip layout pattern for Back Plate.
(8/5/2014)
Page TTT_28
...Photocopy this photo and then enlarge until the overall length is 14"(not counting the 'button' shape where the neck base sits.). {Tape the individual enlarged pieces together to make complete pattern.}
...To make the pattern more durable, I recomment you glue this pattern to a piece of manila folder paper.
..This layout pattern is for the inside of the back plate OR the outside of the top plate. The ends of the tone strips marked "--" are where you sand / scrape the last 3/4" to lower the entire tone strip all across. The ends of the tone strips marked "+" are where you sand / scrape the last 3/4" or so to raise the entire tone strip all across.
...The punched out holes in the pattern is where you can lightly mark the plate to define accurately the tone strip boundries.
...After marking out the tone strips on the inside of the plate, we want to make all parts of the strip to the same tap tone, leaving it as high as possible. {This step follows the proper graduation of the plate wood.}
...Once the strip is even in tap tone all over; we adjust the actual frequency to 198 HZ by sanding or scraping the last 3/4" or so of individual tone strips.
...This is my modified Vigdorchik tone strip method for achieving even tap tones all over each violin plate. (176 HZ for top plate and 198 HZ for back plate.)