Page : AA-43
Modified 7/2024)
..With this step, we begin to effect the Acoustics of the violin and the Violin Timbre directly. For minor changes on the Bridge can have a profound effect on the sound we produce with this instrument. The basics are well understood, but how to do accomplish the fine Acoustical Adjustments, not so much!
..Here we begin to remove some of the 'mystery', with' practical Violin Acoustics'.
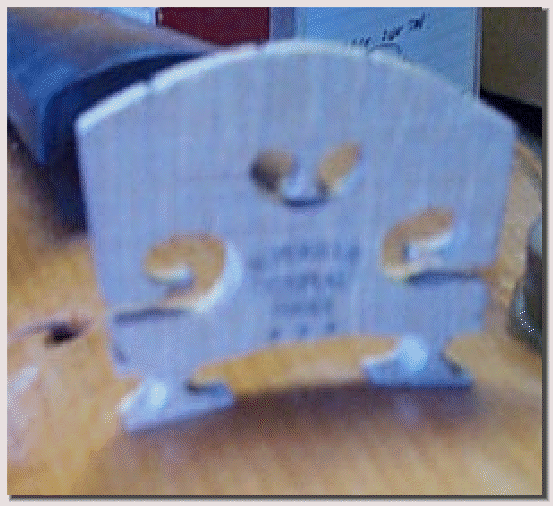
...Now it the time to carve down the bridge to its final dimensions.
...These are my recommendations for full sized violin bridges; I was taught these measurements by Richard Biggs (who owns a violin shop in the greater Chicago area) during the VSA convention in Portland, Oregon, some years ago.
...I tried this modification on the bridge of one of my finished violins and it made a noticable improvement; so I tried it on others and it always seemed a positive change, so now it is my beginning standard for carving new bridges.
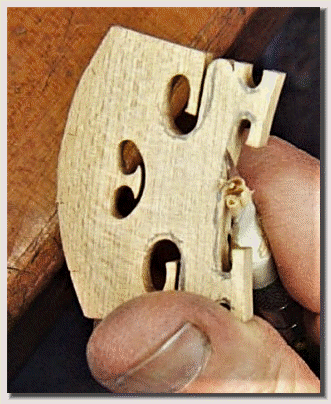
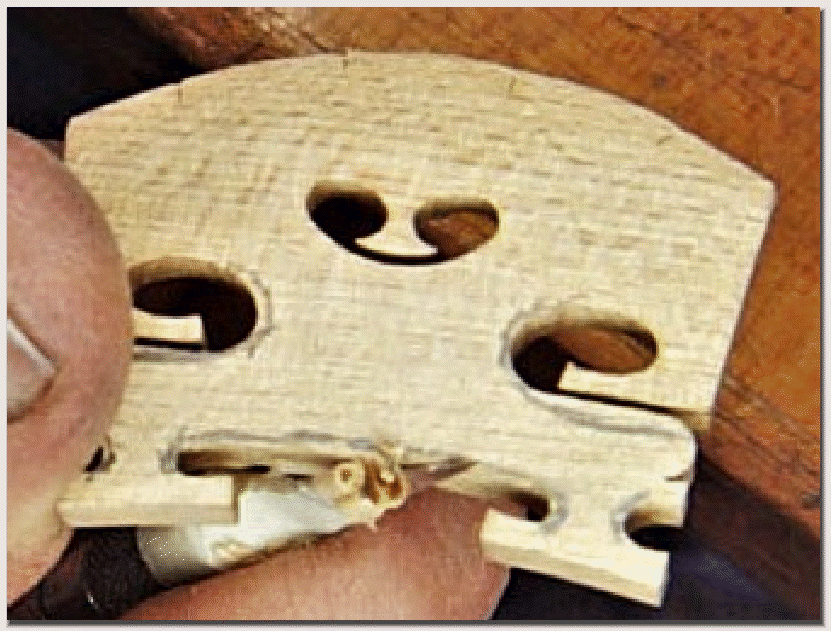
...Using a NEW blade in my X-acto blade holder, carve the shapes being careful to only cut down grain (with the grain).
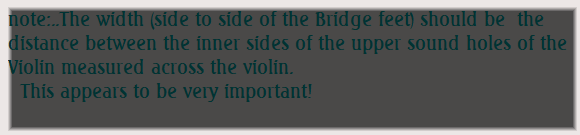
41mm {1.615"} or the distance between the upper sound holes. See note at page bottom...
5mm
0.197"
16mm/ 0.630"
13mm/0.512"
Lines in blue are areas to carve; other areas are left in tact for now.
The top surface is reduced to (1) to (1 1/2) mm (0.040"-0.060") Thickness.
..String Grooves are cut to 1/3 the diameter of each string depth.
...The front surface is tapered smoothly back to this string contact surface on the other side.
...This back (Label) side in not touched.
...Front to back; we want the Bridge feet thickness to be 0.166".
..The bottom of the center "heart" shaped are to top of center arch should be in 0.512" to 0.505" range. Final adjustment to shape come later; but these measurements will get us in close.
..The feet should be narrowed to 4.4 mm (0.175"); evenly in from each side with a fine jewelers file.
{Be sure to exactly match both feet to avoid creating a Wolf Tone}
G
E
..The above measurements are from my Opus # 29 violin which has particularly fine Timbre, and also represents closely those of my best performing Violin Bridges. My suggestion is to carve these dimensions in now.
0.237"
0.534"
0.244"
0.243"
0.505"
0.623"
0.403"
0.432"