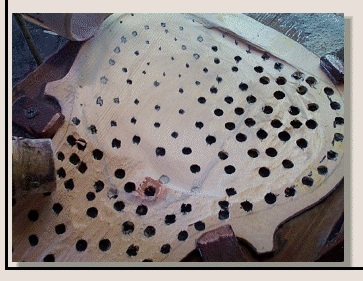
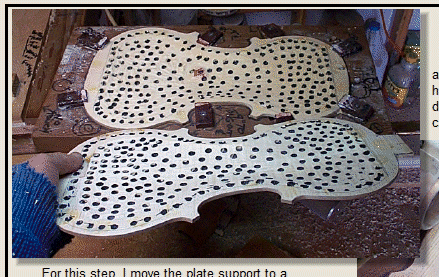
Here both plates have been rough machined and are now ready for hand operations. Notice how all the painted drill marks show full drilled diameter at this stage, with the painted bottoms clearly shown as guides...
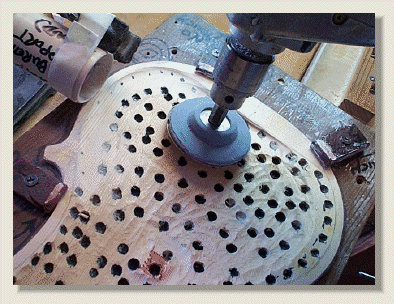
For this step, I move the plate support to a picture framing vise that allows me to turn and position the work at the best angle. I have made a flexible rubber 2 1/2" diameter sanding pad. I use #100 Imperial sanding paper and a high speed electric drill.
This operation generates a lot of fine wood dust which I vacuum off (see the nozzle of the shop vacuum next to the plate edge).
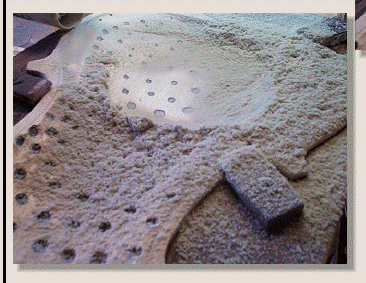
As we approach the ideal thickness, the holes become smaller, as you can see in the photo.
Here I am vacuuming excess dust so I can see my work progress... I do Not want to ever go below the painted bottom of the graduation guide holes except for the final cleanup and final adjustment Plate Tap Tuning.
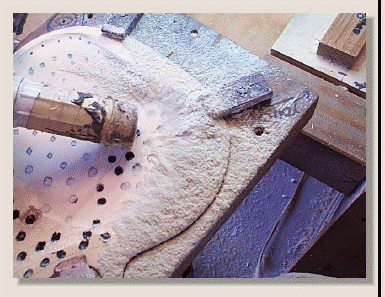
The general principle is to sand the areas with the larger circles until all circles are the same size, then sand more until all circles are tiny points, then sand and scrape by hand until they just disappear. Remove no more material in any area without black dots still showing.
In this way, you should accurately thickness the compound curve areas to reach the ideal plate thicknessing.
Modified 9/2017
Page O16C_39