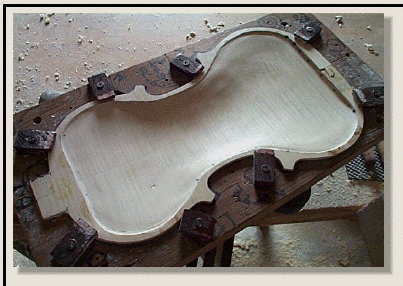
The back plate viewed in indirect low angle light shows smooth transitions between various thickness areas.
At this time the back plate is tuned to an even 242 HZ all over the graduated surface.
After the plate is tuned, the pencil lines are erased (as they could be seen through the 'ff' holes).
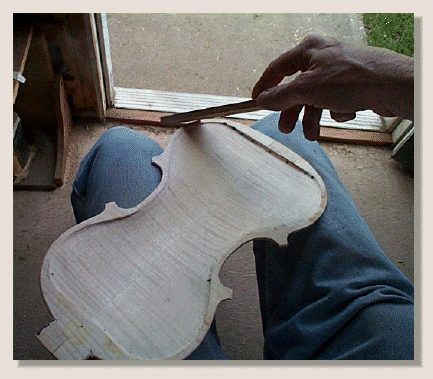
Now using various flat and round sanding sticks, the inside edges are sanded to a rounded shape. (It is easier to do this at this stage than after the body is assembled). Do the same to the top plate.
..At this point I now pencil (or ink) in the volin label to save weight and acoustical changes a glued in paper violin label makes.
..To prevent problems later on, I store all the parts to be glued in a desiccant bag overnight to remove moisture from the wood parts; which are glued up permanently the next day (rib structure and back plate) after warming to 100 degrees F.
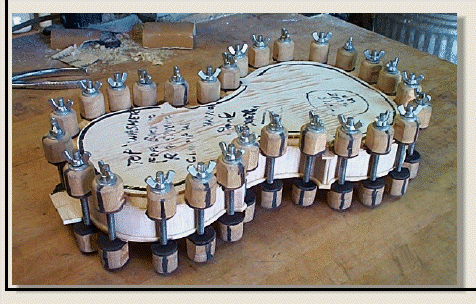
Now the back plate is joined to the rib structure with full strength, fresh hot hide glue. The parts are pre-warmed to 100^F, the alignment pins are inserted through the back plate (to save time during alignment), and the glue is warmed. Glue is brushed first onto the block surfaces twice (as it soaks into the end grain), then brushed on both the plate edges and glue liner surfaces and then parts are quickly assembled and aligned, adding clamps until all is secure.
..Finally, the glue joint is lightly brushed with clean hot water to reset the glue and clean up any glue on the outside of the glue joint.
Modified 1/2021
Page O16C_44
..Here a dummy top plate is used to carry the force of the clamping screws. The top plate will be glued up later on.